 By
By Recording yourself playing music or singing serves multiple useful purposes: listening back to identify what to work on, capturing ideas before you forget them, sharing practice with a teacher, or creating demos. Modern phone microphones and audio apps have become capable enough for all of these, and with the right setup and technique, the quality can genuinely surprise you.
Understanding Phone Microphone Limitations
Your phone has one or two small built-in microphones. They’re excellent for voice calls and reasonable for casual recording, but they have inherent limitations: limited frequency response at the low end (bass-heavy instruments sound thin), vulnerability to clipping when sounds are too loud, and limited stereo separation.
Knowing these limitations helps you work around them rather than fight against them.
Placement: The Most Important Variable
The closer the microphone is to the sound source, the louder the relative signal versus background noise — but too close causes distortion and picks up mechanical noise (fingers on frets, key presses). Too far gives you too much room sound and ambient noise.
For voice or acoustic guitar: 30-60cm (12-24 inches) from the sound source is usually a good starting point. For louder instruments: further away to avoid clipping. Experiment by recording 15 seconds at different distances and listening back.
Avoid placing the phone on a surface that vibrates with the music — the vibration is picked up through the case and creates a low-frequency rumble. Use a small phone stand or prop it against something that doesn’t vibrate.
Preventing Clipping (The Main Quality Killer)
Clipping happens when sound is too loud for the microphone or recording app — you get a distorted, crackling sound that ruins recordings. It’s the most common problem with phone music recording.
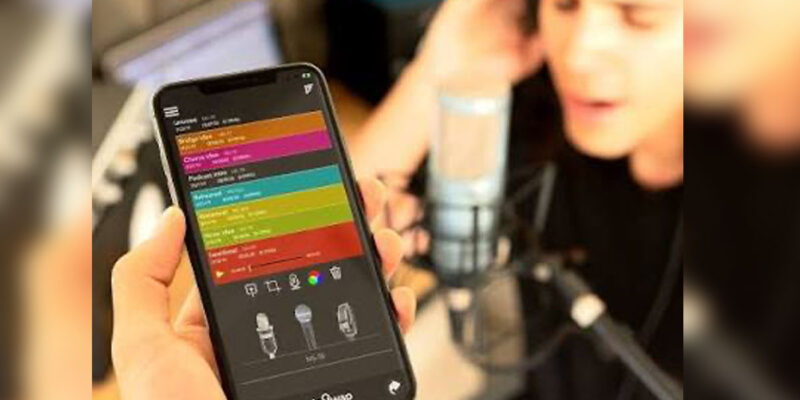
In your recording app, look for a level meter. Before recording, make some of the loudest sounds you’ll produce during the recording (your loudest singing note, your hardest guitar strum) and watch the meter. It should peak in the yellow zone. If it consistently hits red, move the microphone further away or (if available) reduce the input gain in the app.
Apps Worth Using
Voice Memos (iPhone) and Google Recorder (Pixel) are adequate for quick capture and practice recordings. They’re simple and produce usable quality.
For more control: GarageBand (iPhone, free) is a full music recording app with level meters, EQ, and the ability to record multiple tracks. It handles phone audio input well and can also connect to external microphones.
BandLab (free, Android and iPhone) is a full multi-track recording app designed for phone-based music creation. It has effects, mixing tools, and is free with cloud storage for projects.
Ferrite Recording Studio (iPhone) is excellent for more serious recording and editing.
External Microphones: The Upgrade Worth Considering
If you record frequently, a USB-C (Android) or Lightning/USB-C (iPhone) condenser microphone makes a dramatic quality improvement. The RØDE VideoMicro II, the Shure MV88, and the Sennheiser MKE-200 all connect directly to phones and produce professional-quality audio. Prices start around $60-80.
For most phone recordings intended for practice or demos, these aren’t necessary. For anything you want to share publicly or submit professionally, an external microphone is the most efficient quality upgrade available.
Acoustic Environment
The room you record in matters. Bare walls and hard floors create reverb that makes recordings sound amateur. Recording in a small room with soft furnishings, curtains, and carpets produces a drier, more controlled sound. The ideal low-budget recording environment: inside a walk-in wardrobe surrounded by clothes. Absurd but effective.
The Quick Demo Workflow
Capture the idea quickly: don’t wait for perfect conditions. A phone recording of a good idea is infinitely more valuable than no recording.
But for anything you’ll share: spend five minutes on placement, check levels, find a room with reasonable acoustics, and do two or three takes. Listen back before putting your phone down. The difference between a careless recording and a slightly careful one is significant.
Views: 59

You may also like

How to Use Your Phone to Support Someone Going Through a Hard Time

How to Use Your Phone to Stay Financially Organised During a Life Event

How to Use Your Phone to Stay Motivated When You Feel Like Giving Up
More in:Apps

How to Use Your Phone to Find a Therapist or Mental Health Support

How to Keep Kids Safe Online When They’re Using Your Phone
The Best Free Apps That Replace Paid Subscriptions You’re Probably Wasting Money On

TecRounder is a blog that shares New Technology news from around the world (hence the name TecRounder), including the most recent mobile and gadget information: smartphone features, specifications, and more. You can find the latest technology updates here, including the most recent information on smartphones, laptop computers, and other electronic devices.